The archives
Return to the
Now spinning
page
Summer explorations
June - August 2007
29 August 2007
A few years ago I took a class on colour in weaving and learned (among many other things) that there are no bad colours -- there are just colours that aren't in the context they need. If you take that thought to heart and incorporate it into everything you do with colour, you can shake yourself out of the normal, comfortable routines and end up with surprising and beautiful results.
I do try, and normally things work pretty well; but there's one glaring exception: pastels. They leave me clueless and dismayed.
The silk dyeing that's been happening here lately hasn't all been for me. I'll be including dyed silk in the packets my students get at the upcoming Knitting and Stitching shows -- and because I know some people like pastels, I've been dyeing them: both variegated and solids.
And because it's only fair to test how things look before you start sharing them, I spun a bobbin full of pastels: one ply of solid pale blue-green, one ply of variegated. It's tussah silk with fairly low lustre, but it has a pleasing sparkle in strong light.
The flash in the bobbin photo shows the silk's low sheen at its maximum; the photo taken in indirect daylight (right) shows a little less sheen than the yarn actually has. ...This photo was taken after the yarn had been washed.
Silk is such an amazing material -- this yarn is lighter-weight than you might expect from the picture, and it's a pure pleasure in the hand. In use it will be pretty wonderful, for either knitting or weaving. It has a delicious, supple fluidity, and it's pretty -- despite its mild colour. ;-)
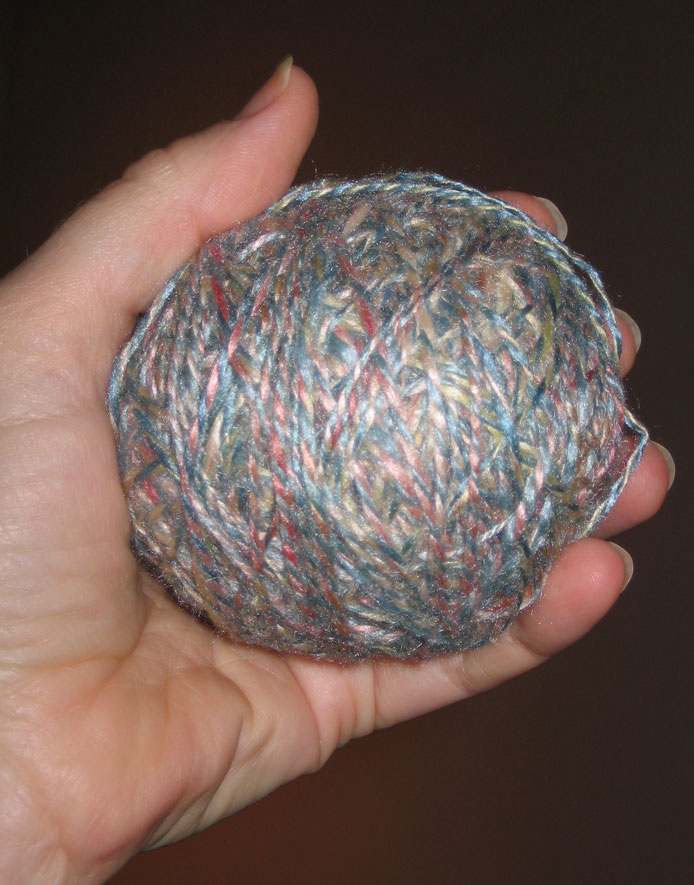
After the yarn had been wound into a ball (left), I started liking it even better. With its parts lined up and held in place, the yarn shows itself off nicely: varying nuances of pale colour, faint sparkles and subtle sheen. (All the photos here can be clicked for a closer view; and this one is well worth it!)
This ball of yarn weighs 38 grams and contains 152 metres of yarn -- which is plenty of yarn for a knitted scarf. And knowing that, I imagine I now need to knit one, just to see how long a scarf it will make. ...Luckily, the yarn has coiled itself into my affections, so we can work together in peace!
It's just a small problem now, my attitude toward these pastels. And it takes only a slight shift of thought: instead of a blazing, vivid sunset, this is the pearly last light of day.
15 August 2007
Grey days are excellent for dyeing.
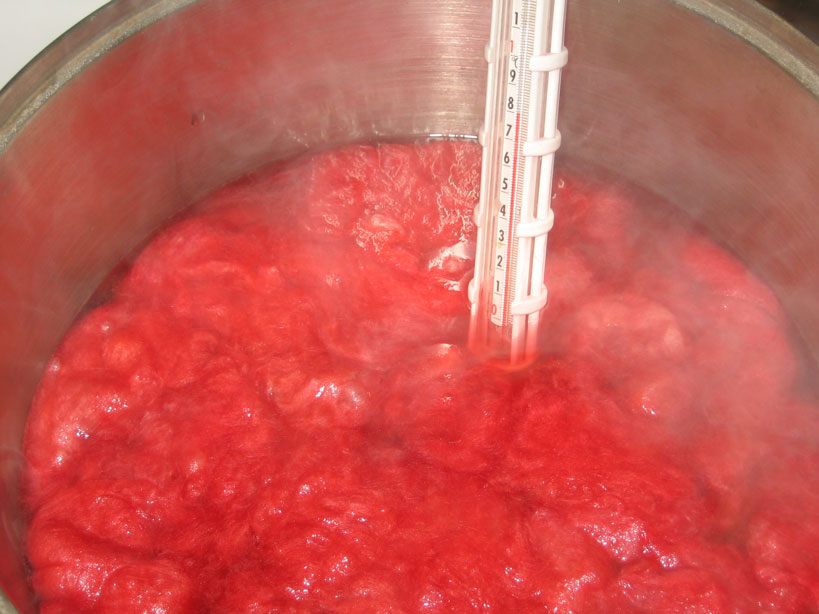
That's how it started: a dreary twilit day, a hunger for colour, and a willing dyepot. What you see steaming in today's batch (left) is tussah silk, which will emerge as a brilliant, faintly variegated wild-poppy red. It's not the first batch, and it's clearly not going to be the last!
When this started, the most insistent colour vision was of a teal green; so I dyed a nice batch of tussah silk to match it, complete with faint undulations in the tones from blue-green to greeny-blue, and that silken tendency to enliven colour with shimmer and shadow. The next to catch my imagination was a raspberry shade, with nuances of red-violet and purple-ruby. And then I started thinking about variegations....
The first variegated silk tops emerged from their bath vivid and lively: the full rainbow, and then some. Those were followed by more sedate, pastel dye lots in pink, yellow, apple-green, eggshell and blue. Dye, dye, dye. Dye happy. ;-)
In thinking of various colourways, I'd thought to handle them all separately; but colours have minds of their own. The vivid variegations paired up eagerly with the more intense undulating colours; at the same time, the pastels nestled in with the teal and raspberry tops as though they'd found natural mates. ...When the colours insist, who am I to argue??
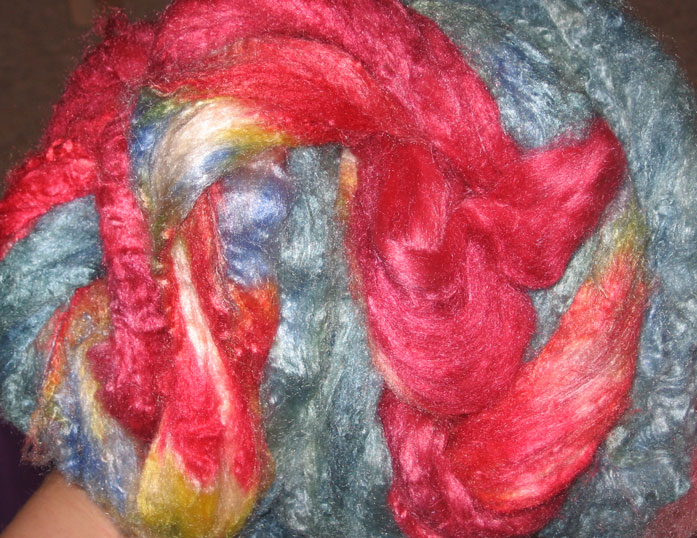
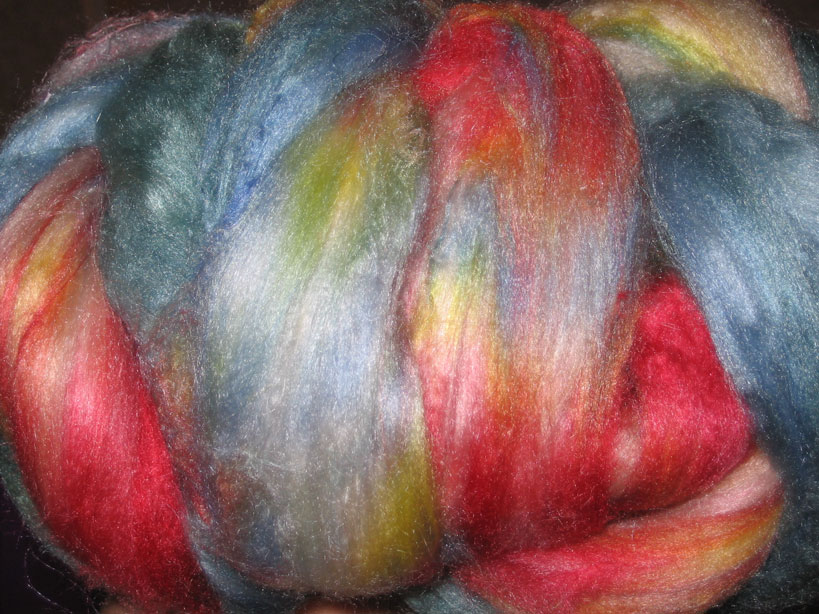
Fresh from the dyepot, the tops look touseled and faintly shabby. Even after drying (left), their "spinnability" isn't as apparent as before they were dyed.
Happily, one small tweak of the fibres gets them sleek and comfortable. The photo (right) shows the same batch, ready to spin: a teal top intertwines with a variegated one.
Dyeing is a joy unto itself, whether you're using natural dyes or synthetic; and the colours that emerge from the bath are pure inspiration -- but when you have magical colour pairings like this, in tantalizing, shimmery silk, you have to spin it! ...So I did.
It's good that the dyed silk was offering suggestions, because I'm really a novice in how to help colour show itself off. The first spindleful of silk in undulating teal gave me time to observe and think. The teal itself grew richer and deepened as twist entered the fibres; and by the time the spindle was full, the next step was clear: to see what would happen if this almost-solid colour were plied with a variegated yarn.
What happened was a multi-toned yarn that was interesting, but not inspiring (and maybe not even attractive). ...Until I knit it into a swatch. And then -- holy-moly!
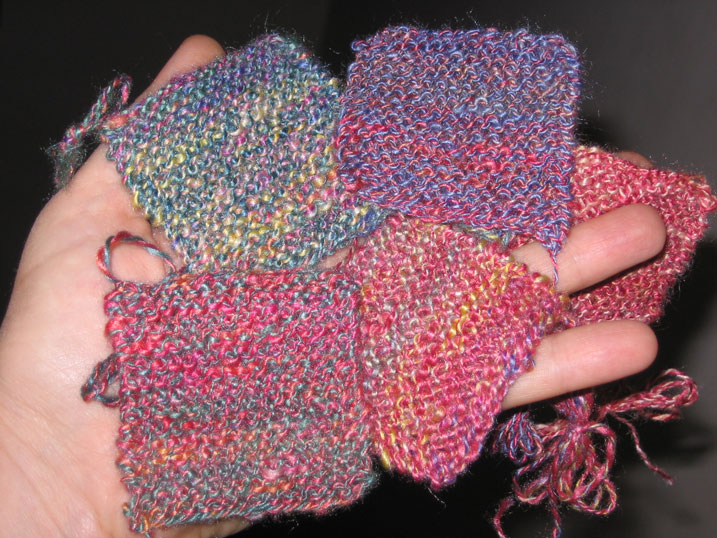
That first swatch was teal plied with pastel variegations. The unpromising yarn produced a knitted square with the allure of Claude Monet's gardens: mixed flowers in shimmering foliage, and sky reflections in the pond!
Other skeins and their swatches followed in quick succession: raspberry and pastel; teal and bright variegations; lobelia and rosy purples. I hope the photo (left) can convey some of the excitement these swatches inspire when you can see and touch them. In real life, they're beautiful. I'm completely hooked!
And there it is: a remedy for dull days (or weeks) when the clouds drag their feet and the outside world has all gone grey.
31 July 2007

Even when the weather isn't great, you get rewards for patience and attention.
This blaze of colour came at the end of a particularly dark and smeary day. I loved the shadow-within-shadow and light-within-light effect in the sky -- and it lasted for only a few seconds. (Click on the thumbnail for a fuller view.)
It's as though the day ended by exclaiming, "Look, and be inspired!"
23 July 2007
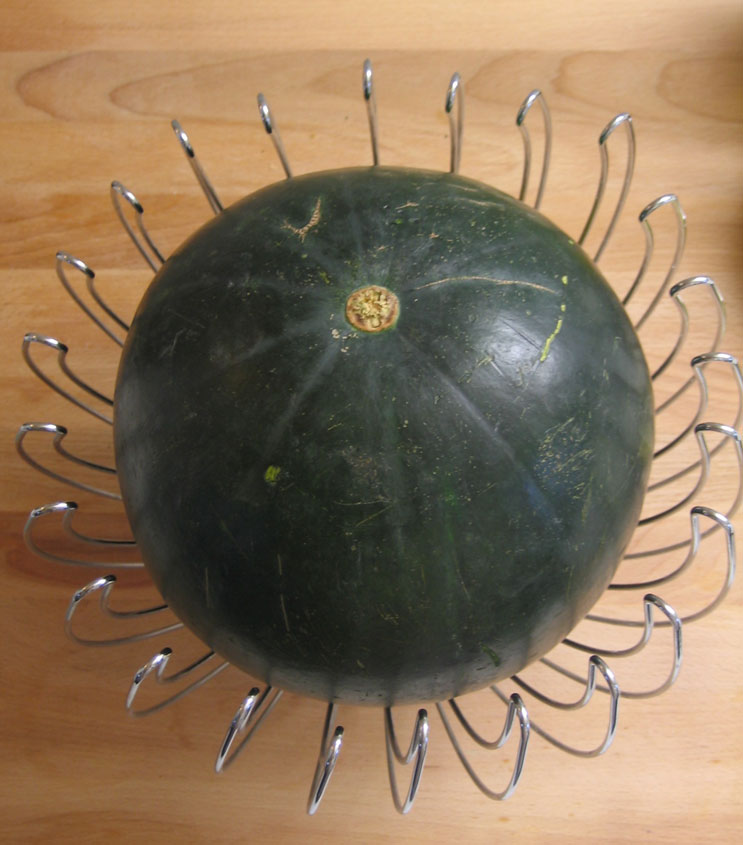
Summertime. Despite the watermelon, we haven't had much of a summer in Paris this year. Or maybe I should say, we had a glorious summer... and it lasted three days. ;-)
Weather aside, things have been happening! A few days ago a group of four Braid Society members (including me) got together for an all-day class with Madame Kim Sang Lan, a talented artist known for (among other things) her work in maedup, the art of Korean knotting, and who studied the traditional arts with one of Korea's National Treasures. Maedup knots are varied and beautiful, and unlike Chinese knots, are made without pins, sticks or external supports -- you create them with just your hands (even the most complex structures!).
Most knotters these days simply purchase their cords and gimps; but in traditional knot-making, the first step was braiding the cord to be used in the knots. Learning to make those braids was the object of our all-day class.

The three main braids used as cord in Korean knotting are all "simple" compared with traditional Japanese braids; but a full day was barely enough to cover what we needed to know about them.
All are hollow braids, formed either around a well-tensioned core (as in the photo of Mme Kim braiding, right) or around a spike that helps form them. The Korean braiding stand (the kkun tuel) looks quite a bit different from the better-known Japanese maru dai. Besides having a conical "skirt" and a different tensioning system, the Korean stand's "top" is small, which lets an experienced braider work at very high speed, their fingers and thumbs moving in a graceful dance as they move the braid elements.
It was an amazing day, and many new things are going to come from it. ...Among other things, I plan to make myself a braiding stand along the lines of the Korean kkun tuel -- though I think I'll stay with the simpler, older model: square top, spike in the centre, and no complex tensioning mechanism. ;-)
I haven't written much about braiding yet in these pages, but it's a near-constant activity here at our place. Braids are both useful and lovely, and they're especially interesting to handspinners spinning silk: a braid using handspun yarns is a delight, start to finish.
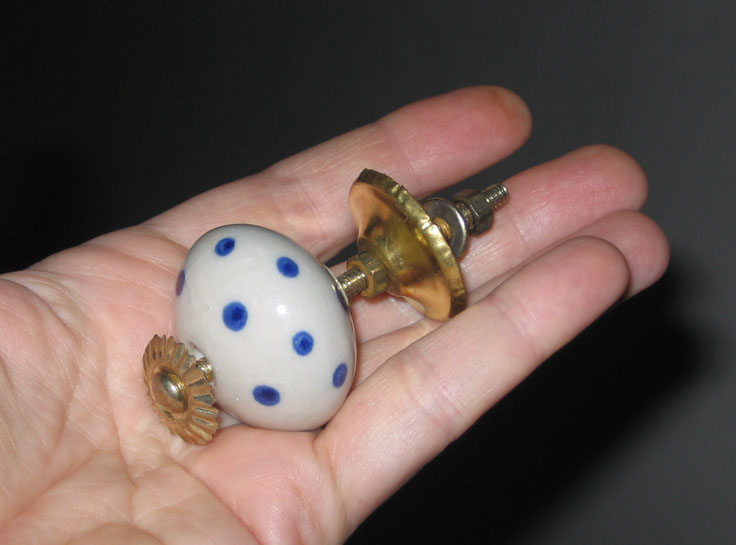
The day after our intensive class, my friend Shirley and I went into town with what seemed a reasonable list of things to do -- and never got past the first stop: a boutique selling "stuff" from the Orient. There were handmade boxes, nomad jewellry, tables, baskets, sculptures, printing blocks, weaving tools, doorways, window frames, cabinets, masks... and porcelain drawer knobs (left). Very inexpensive, very pretty porcelain drawer knobs. I bought enough to dress up my kitchen cupboards.
Over lunch, Shirley said, "You know, you're going to need more bobbins for braiding, and something about those knobs has got me thinking." We both know people who've used large bolts from the hardware store as improvised bobbins; and it seemed something like that might work here, too. She pulled a knob out of her bag, turned its metal bits around, and the rest is history: we went back and bought nearly all the bobbins, er, knobs they had!
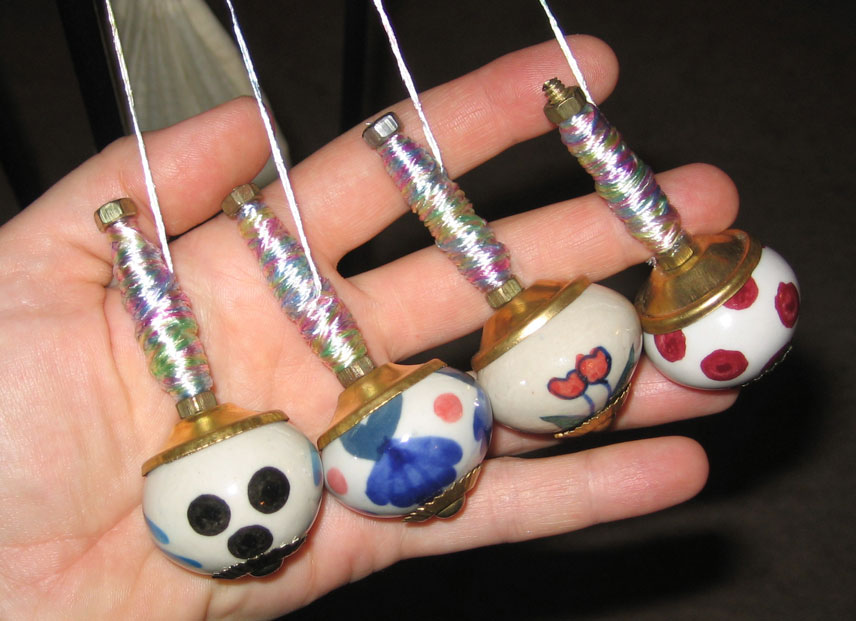
That evening we cleaned them up, put cling film around the bolt threads, and prepared a braiding warp (right). The "knobbins" all weigh 58 grams (excellent for use on both the maru dai and the taka-dai), and they are smooth and comfortable in the hand.
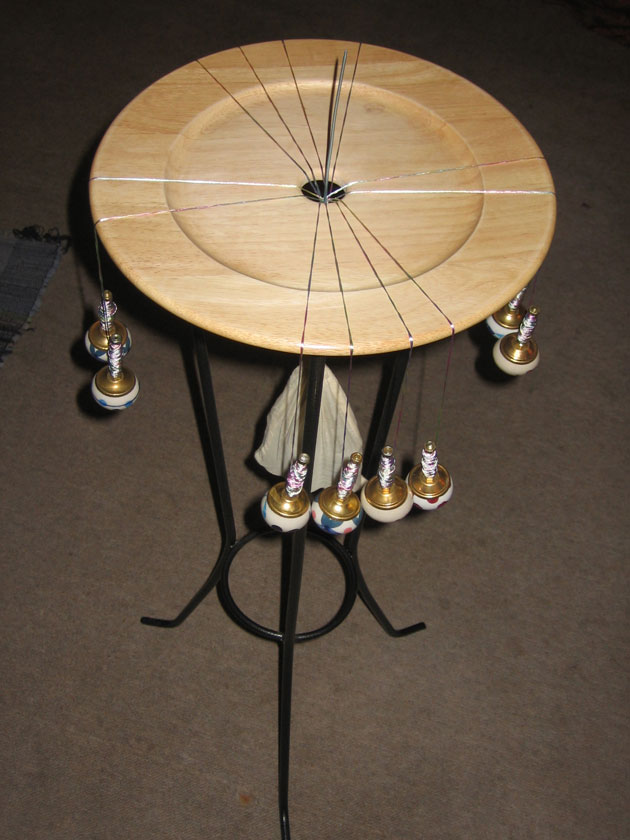
The next test was to see how they behaved in braiding; so we set them up on an improvised braiding stand (one of my favourites: a wooden plate on top of a metal plant stand, left). The structure for this test run was one of the Korean braids we'd just learned: a 12-bobbin hollow braid formed around a spike (the "spike" in this case is a pale blue knitting needle). It's a Korean structure, but we set it up like a Japanese braid, with a counterweight providing tension from below.
We hoped they'd be good bobbins. They're much more than that: they're glorious. As you braid, the porcelain parts of the knobs tap against each other gently, and that quiet tapping punctuates a soft chime coming from the brass parts -- barely audible, but quite beautiful.
Besides delivering sheer pleasure, they also behave well: they hang straight down, do not tangle, and allow you to advance the warp with the usual sliding braider's hitch. We wound a three-meter warp, which is now nearly used up; and in all that length, none of the bobbins has "let go" and made me chase it across the floor. Pretty darned good!
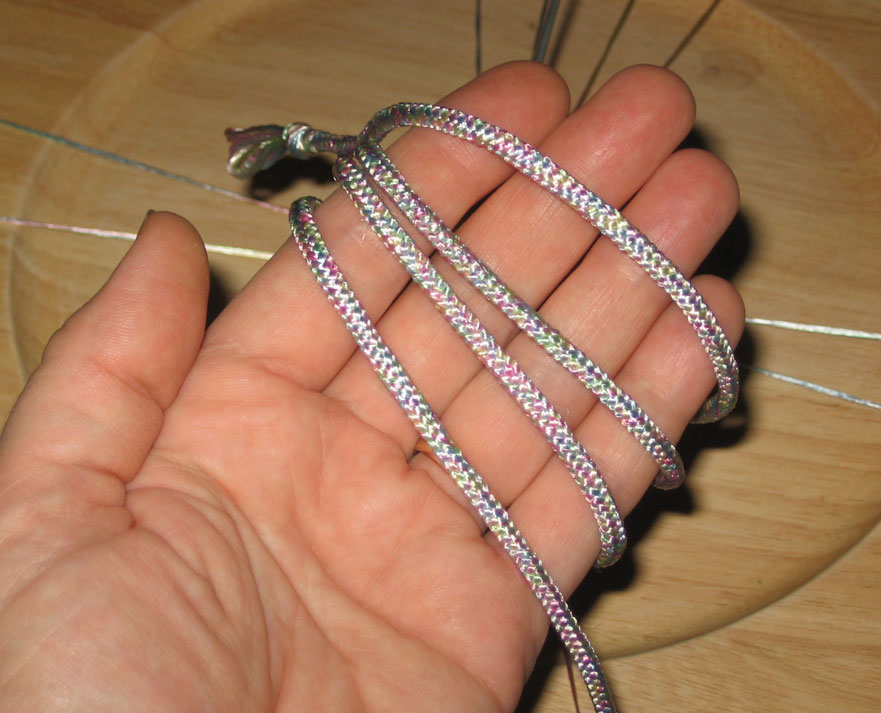
Even though it was a test run, the braid is lovely (right - click on the thumbnail for more detail). It is hollow, but firm and less elastic than I'd imagined, and it has a roughly rectangular cross-section. I'm sure it would be excellent for knotting; but it also strikes me as an exceptionally useful braid, and I sense there will be more like it in my future!
End notes, for inquiring minds
♦ The Braid Society is an organization of people fascinated by braids, plaits, and narrow weavings. Membership is open to all who share that fascination (click here for more information).
♦ The porcelain knobs were purchased from "Gracieuse Orient", an amazing four-floor treasure trove on the northern edge of Paris. Click here to browse their website.
♦ The pretty yarn making up the braid is a variegated rayon floss purchased from Uppingham Yarns in England (click here to visit their website.)
02 July 2007
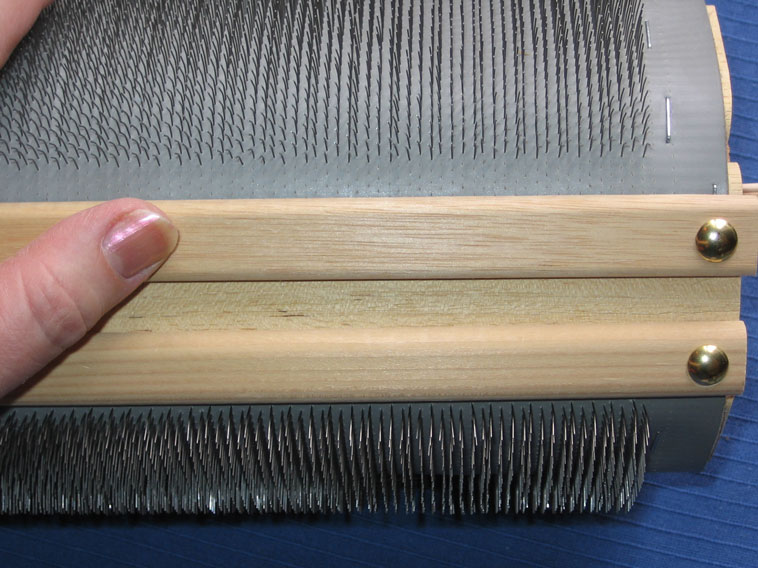
The carding cloth on my original carding drum is medium: perfect for most wools, but frustrating for blending fine, slippery things (like the new silk and alpaca that arrived from Germany a few weeks ago, which I immediately blended on hand cards and fell in love with).
For some time, it's been clear that a second carding drum with finer cloth would be a welcome addition to my tool collection; and to that end I finally stacked up enough pennies to buy some new, finer cloth. And at long last, this past weekend it got put to work (left)!
And darned if it isn't a grand thing. :-)
Stay tuned -- this new carder was built from all-new materials, and I took enough photos to write up a proper article this time. And that article is now on the top of my list!
27 June 2007

While at Bibracte a couple of weeks ago, my friend Claire showed me a photo of the project she planned to do next: a reproduction of an old bonnet recovered from an archaeological dig in Denmark. The bonnet is made in sprang, with tablet-woven edges. And with a too-innocent look in her eyes, she sighed, "But I have no idea where I'd get the yarn for this. It would have to be firmer than any of the the yarns in the knitting store." ...And yes, of course she knew what she was doing by saying that out loud! ;-)
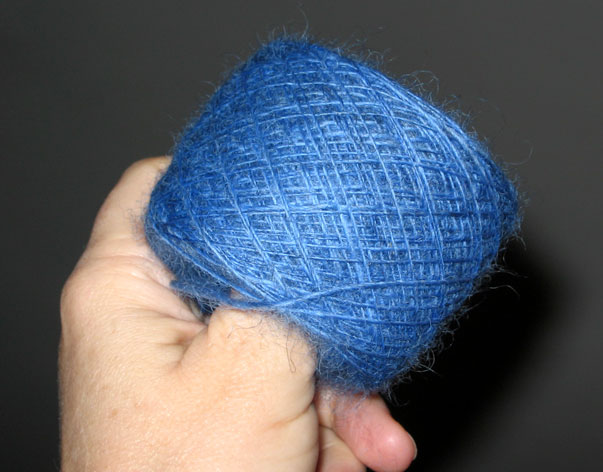
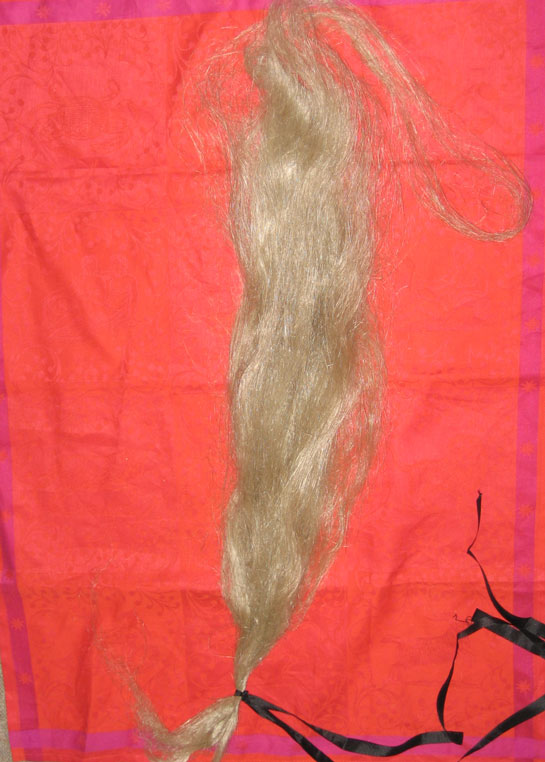
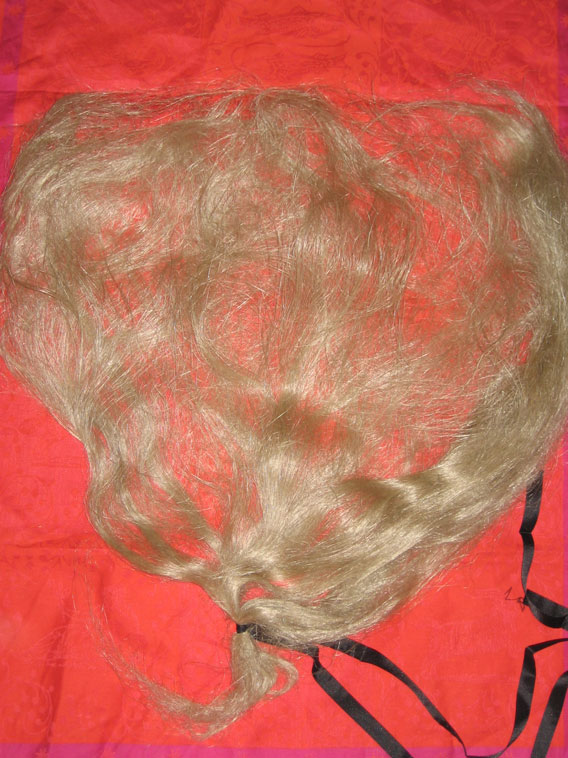
From the photograph, it looked as though the original bonnet was made in two colours: a medium grey for the main parts, and a darker colour for the pattern in the tablet-woven trim. It's wool -- and I immediately thought of my nice Romney fleece: medium crimp, medium length, medium coarseness... and medium silver-grey. For the contrasting part, I got out the dyepots and made some of it a pleasing deep blue.
The results (above left) are inviting, aren't they? ...Click on the thumbnail for total tactile temptation.
Because Claire would be using both yarns in tablet weaving, they needed to be firm, smooth, and adequately twisted. I processed the fibre with my carding drum, with an eye to spinning a semi-worsted yarn: I flicked open each end of each lock of wool before feeding it to the drum, and I kept the locks all pointed the same way.
This was the first time I'd flicked locks open before carding on the drum, and I was amazed at how that simple step increases the efficiency of the process! Granted, this fleece is pretty orderly; but it took just one round of carding to get a beautiful, flawless batt. Flicking takes a few extra minutes, but being able to card a batt just one time more than makes up for it. I'm darned impressed.
After taking the batts from the drum, I divided each one into four sections, being careful to respect the fibres' alignment (I wanted to spin from the "butt" end of the fibres toward their tips). By rolling each section into a "bump", the fibres were protected until I was ready to spin them.
The yarn was spun with plenty of twist and the short-draw drafting technique; and the singles was really quite pretty! The blue wool had a larger number of shorter locks in it, which made for a few "poufs" here and there in the yarn (you can see them in the singles if you look closely); but I don't think it's enough to be a problem in the final product.
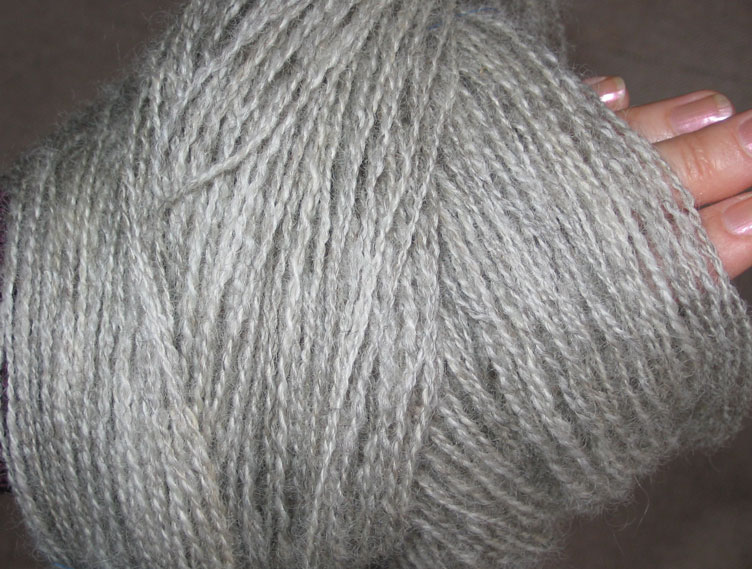
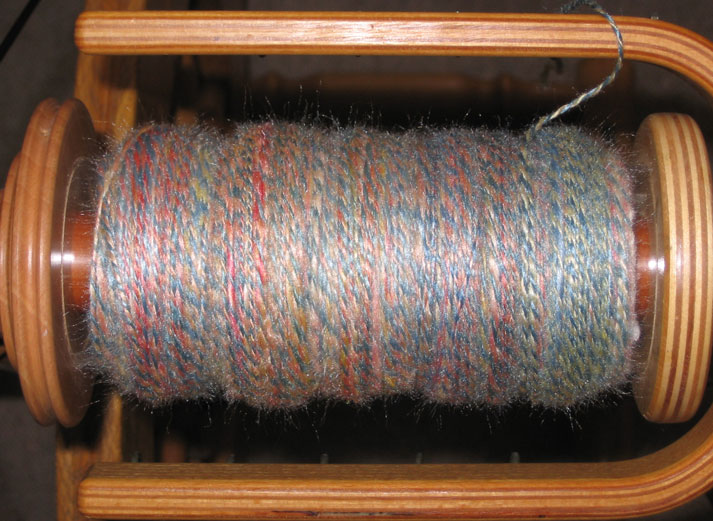
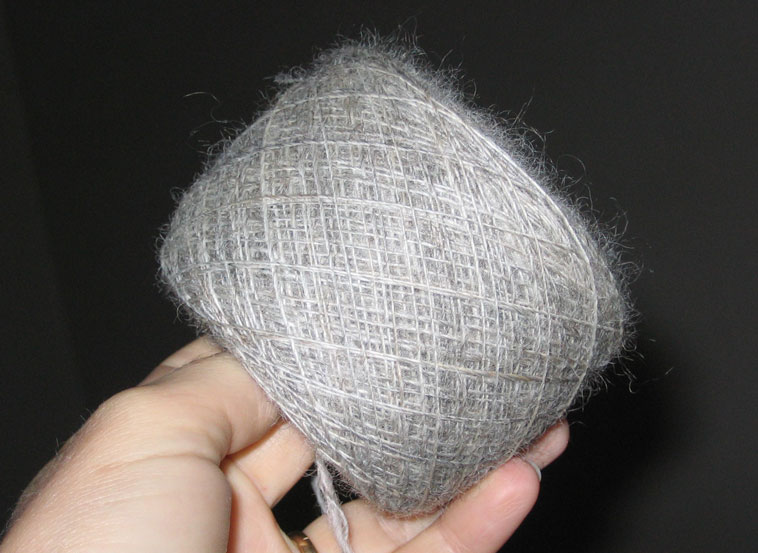
The singles had quite a bit of twist in it, and to make it easier to handle in plying I allowed it to "rest" overnight before taking it on its next ride. I'd made a sample of the final yarn I wanted, and plied the singles into a firm 2-ply yarn using that sample as a guide; but after washing (that essential final step that's always a bit of a wild card), the yarn puffed and "bloomed" more than expected (left). It's still a nice yarn, though, well within the limits I'd mentally set for it -- and I think it will be firm enough to withstand the rigours awaiting in its future.
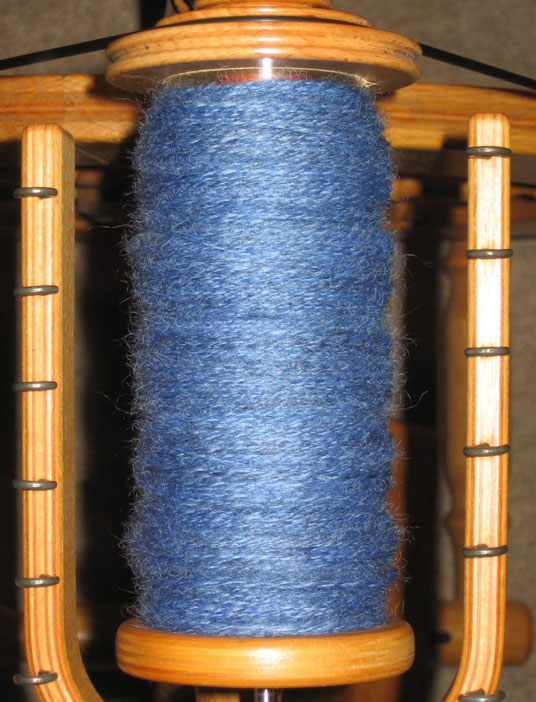
By all measurable things in my control, the 2-ply blue yarn should end up looking like a tinted twin of the grey; but the way it looked on the bobbin (right) made me wonder if that would be the case. My notes tell me that this yarn has the same amount of plying twist as the grey version -- but it sure doesn't look like it. It will be washed this evening, and we'll see what it looks like after its post-bath bloom.
In any case -- we have yarn! Claire will soon be able to start her next project, and she's promised to show me the results. It should be interesting! I've done a reasonable amount of tablet weaving but have never tried my hand at sprang -- and if it makes special demands on its yarns, I have yet to discover them.
Learn, learn, learn! :-)
End notes, for inquiring minds
♦ The beautiful Romney wool came from a sheep named Simon, who lives with the nice people at Spring Hill Farm Romneys (click here for more information).
♦ The flyer and bobbin holding the plied blue yarn in today's last photo belongs to my Louet wheel, described elsewhere in these pages.
22 June 2007
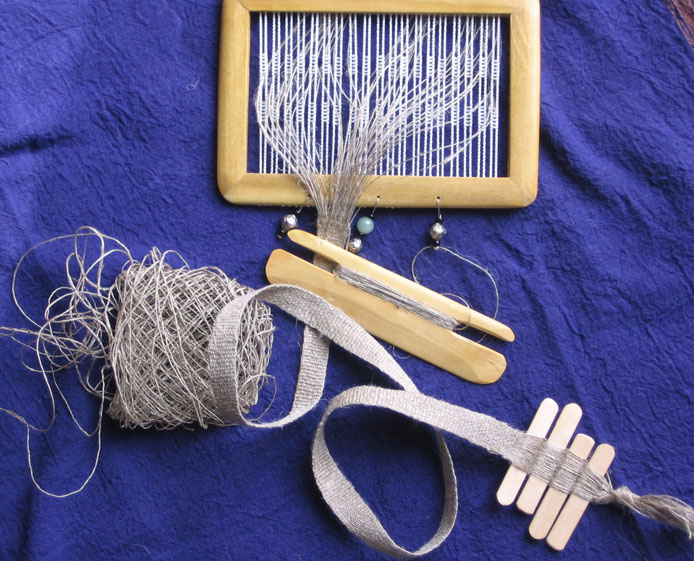
Getting back to serious pursuits (heh, heh, heh) -- it felt like the time had come for testing the first-run linen yarns spun on the two-handed (Em) wheel. The first two spinning sessions produced four skeins, each about 90 meters long, all dry-spun singles; and I decided to try them as both warp and weft of a narrow band (left).
I'm not an unusually brave person. It made me nervous to use my fine (rather, fine-ish) handspun singles as warp. All the nubs and snarls that managed to sneak past my efforts at two-handed spinning would show, and they might also break. Any weak joins in the yarn would puff and separate. It wouldn't be smooth in any case, because the yarn had been dry-spun; but the normal hairiness of a dry-spun yarn could decline into "super-fuzz" with handling, and I dreaded seeing that happen.
To calm the hairiness a little, I re-reeled my skein of yarn, running the yarn through a wet sponge in hopes that would smooth the surface of the linen. It did; so I re-wound it again with a ballwinder, running it (again) through the damp sponge. And when it was dry I took a deep breath and measured my warp.
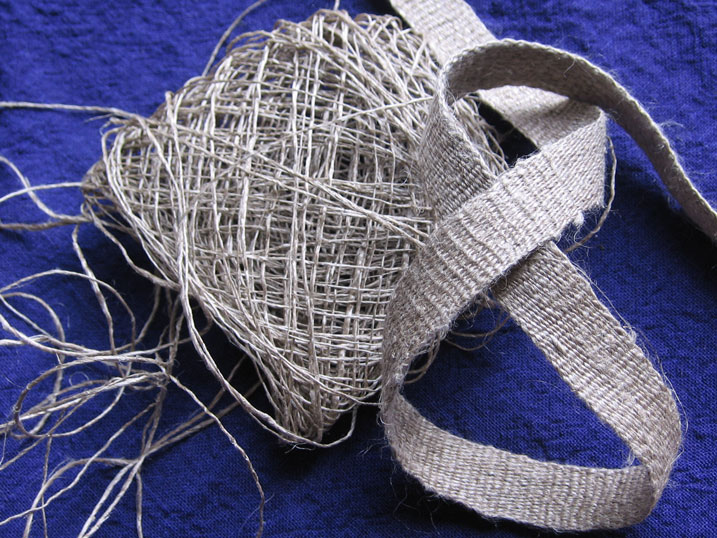
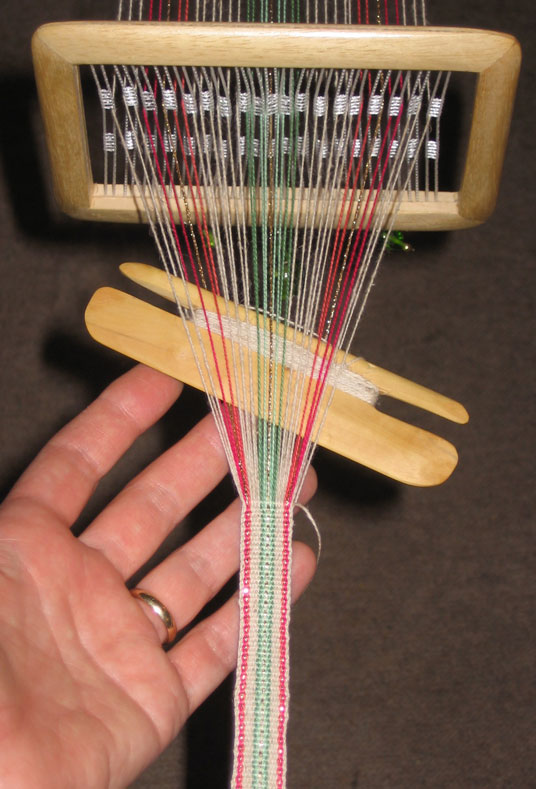
All through threading and warp tensioning, the yarn behaved beautifully. I wove four flat sticks in as a header, then started weaving the band with the same yarn as weft -- and it still behaved beautifully. In fact, it was a grand pleasure to work with it! The yarn has a lively feel, and it transmits that to the band in weaving (right).
Weaving was easier when the yarn was slightly damp -- not wet, but damp. Daubing the warp from time to time with a wet sponge, both in front of and behind the heddle, helped keep everything smooth and flexible.
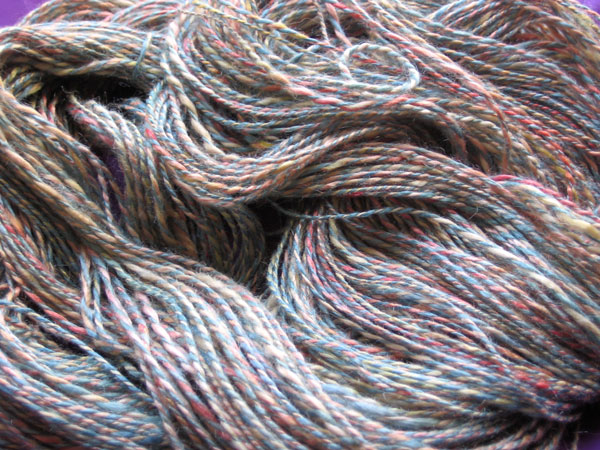
I can't tell you how happy this makes me. In the skein, the yarn looks okay, but I never expected it to work this nicely. (For a detail view of the band and yarn, click here.)
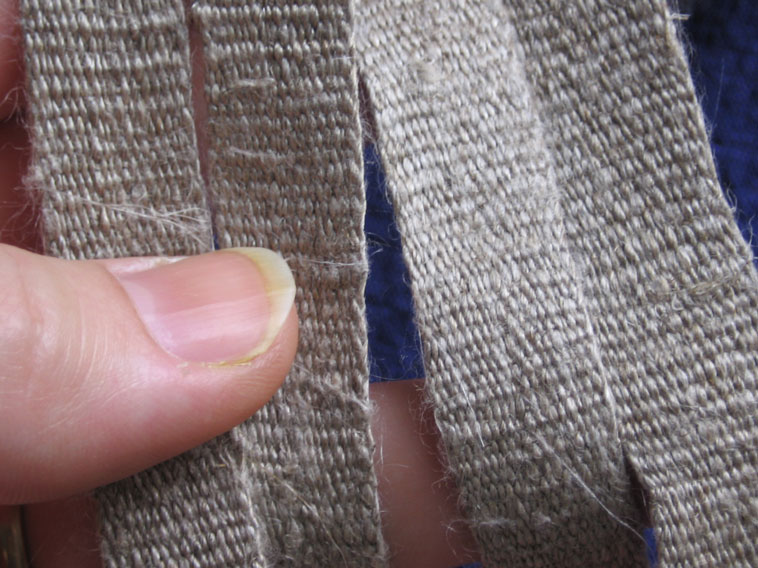
The tactile element is always missing from photographs. In hopes that you can get a sense of how this band feels in the hand, here's a macro view (left).
It's a warp-faced band, and all those parallel threads lying side-by-side give the band's surface a cool smoothness despite the occasional stray fiber. The linen itself gives the band a density and spring that makes it feel almost alive.
It's hopeless: I'm hooked, and loving it! :-)
End notes, for inquiring minds
♦ The beautiful line flax that went into these yarns was produced in Belgium and purchased from Fibrecrafts in Surrey, England (click here for more information).
♦ The little weaving frame is a semi-rigid heddle, made by my very own hands! If you'd like a semi-rigid heddle of your very own, they are available (click here for more information).
19 June 2007
This past weekend was one of magic and discovery. I was at the museum of Bibracte, in the Morvan -- a beautiful and wild part of France situated in the hills west of the wine-producing parts of Burgundy.
Bibracte was once a bustling centre in the Celtic world, a capital of the region known as Gaul, a thriving commercial hub for trade routes reaching all corners of the European continent, to the edge of the Orient. That was a long time ago, when Celtic civilisations dominated the western world.
The museum of Bibracte is perched on the side of Mont Beuvray and is not only an archaeological museum, but also the European Centre for Archaeology, a place of study, exploration and research. Archaeological digs are ongoing on the site, in the forested area around the museum itself; and vestiges of the old city are everywhere, if you know where to look.
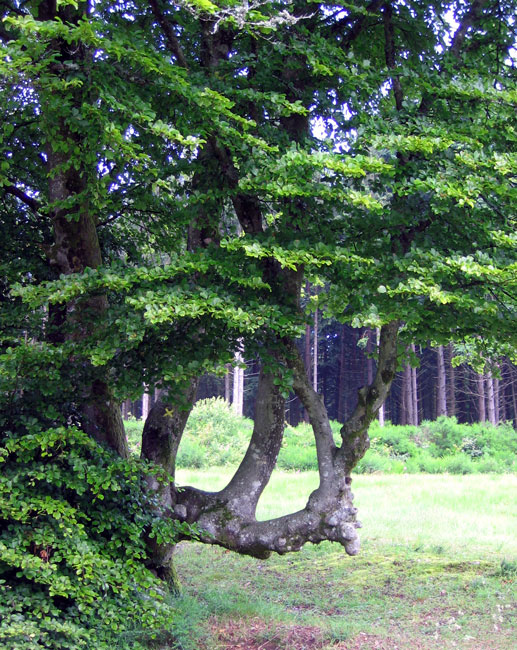
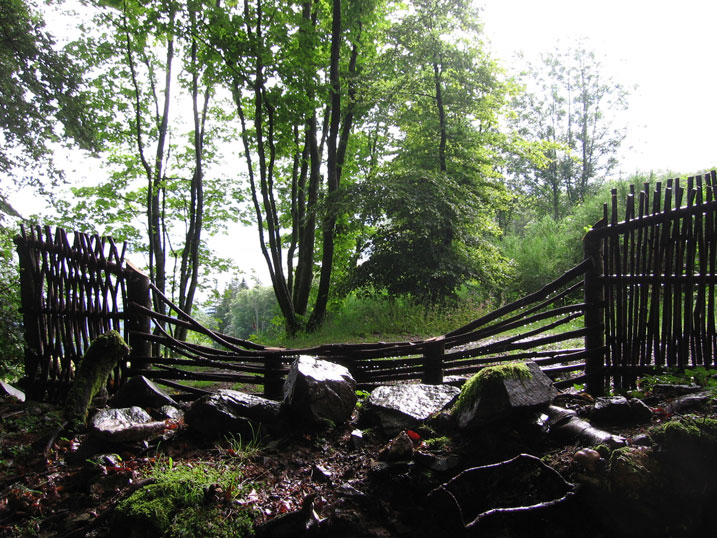
Twisted trees bear witness to an old and beautifully simple kind of fortification: young saplings were bent over and plaited with other trees, then trimmed as a hedge to form a dense, wide, living wall -- a very effective barrier. The hedge-like fortifications were kept trimmed for hundreds of years. The hedge-trimming stopped when the city's power waned; and the trees resumed their upright growth habits.
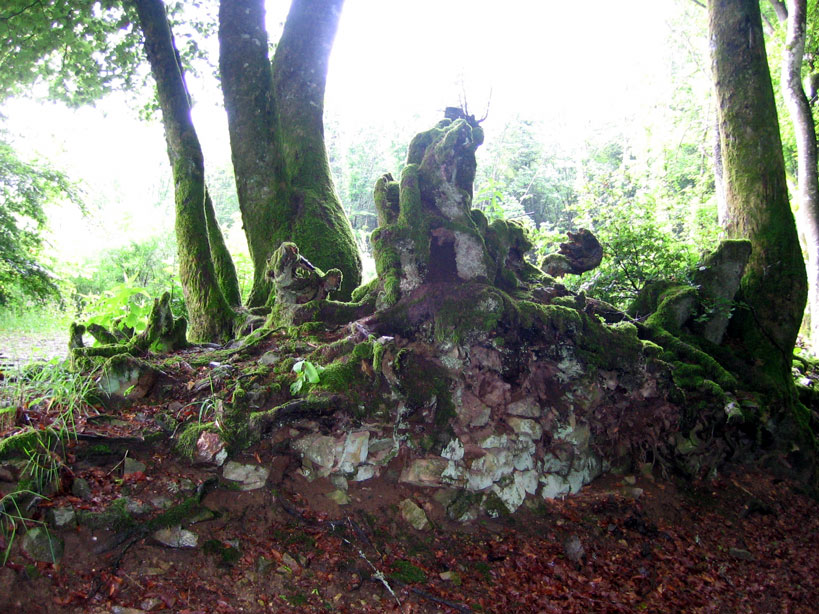
The deciduous forest is full of these interesting, twisty tree forms, all bearing witness to the history of the site. Archaeologists can use these trees as keys to unlock many of the site's secrets: when the city was built, where its limits were, when it was abandoned. Their odd shapes are eerie, magical presences in the dappled shade of other, more ordinary trees.
And what does all this have to do with spinning? Well, it's a background -- in every sense of the word. ...We were there, a number of us, as part of a "faire of woven goods" to echo the annual textile markets that took place in the summer in villages all over Gaul. The fair's theme this year was Lace and Trims -- and as one of the exposants, I demonstrated spinning fine linen thread and weaving it into narrow tapes (the lacemakers were surprised and enchanted by the way flax is transformed into fine linen!).
Besides spinning and narrow weaving, I also demonstrated braiding: kumihimo on the marudai and a simple Scandinavian plait. The colours and rhythms of Japanese braiding seduced most of those who saw it -- kumihimo is not very well-known yet in France, and the movements of braiding (not to mention the resulting braids) are really quite beautiful.
The demonstrations ran all day Saturday and Sunday, and at the end of it all, we were tired and happy -- and my friend and I decided to take an extra day to wend our way homeward. And we decided to wend in something less than a straight line. ;-)
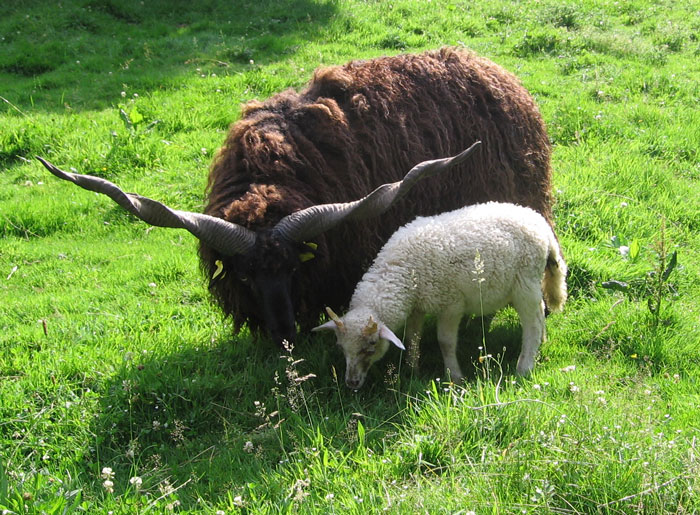
The wending led to the "Moutonthèque" at the Plassard yarn factory. We had been told it was a large collection of many species of sheep, all ranging freely in a vast park-like setting. (Doesn't that sound idyllic??)
There were sheep; and there was a park; but the claims of "many" and "vast" were exaggerations. Still, we saw some amazing creatures -- and the park was calm and lovely. A small Mouflon sheep wanted to come home with me -- and the intelligent, steady gaze of the goats stole my heart. Click on the thumbnails for a bigger view.
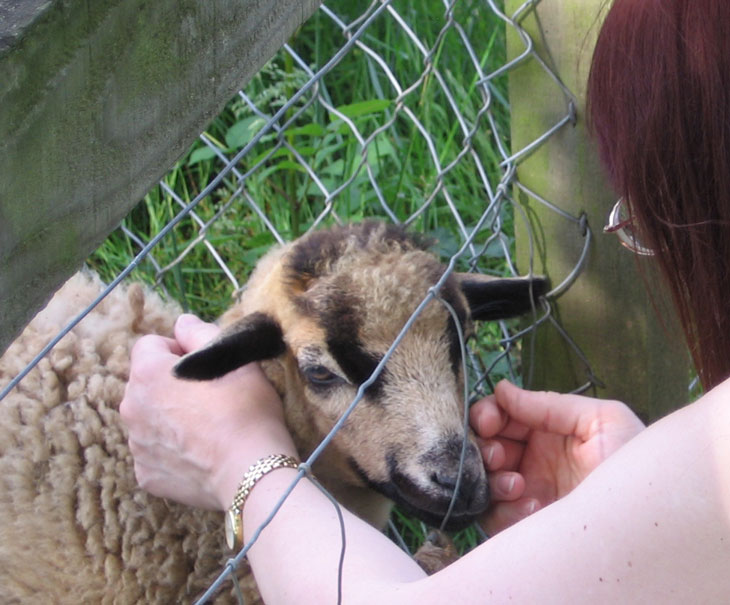
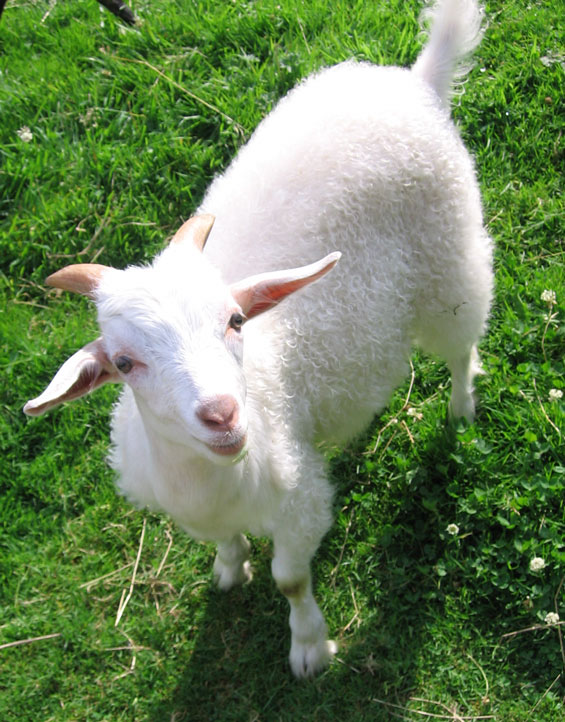
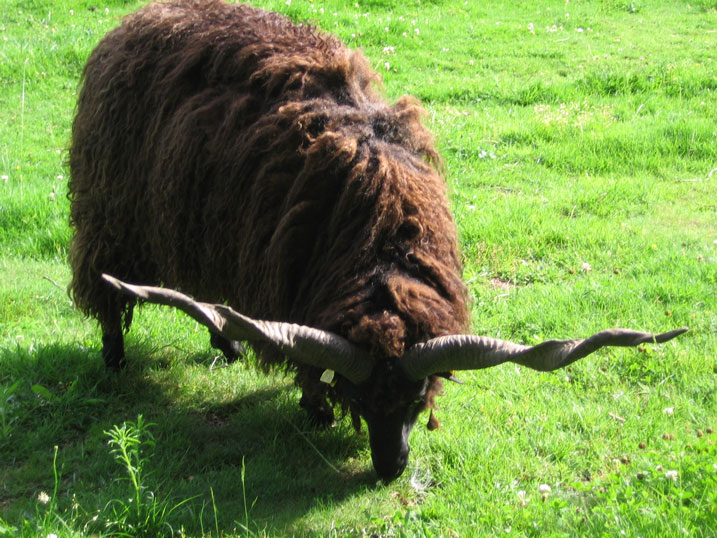
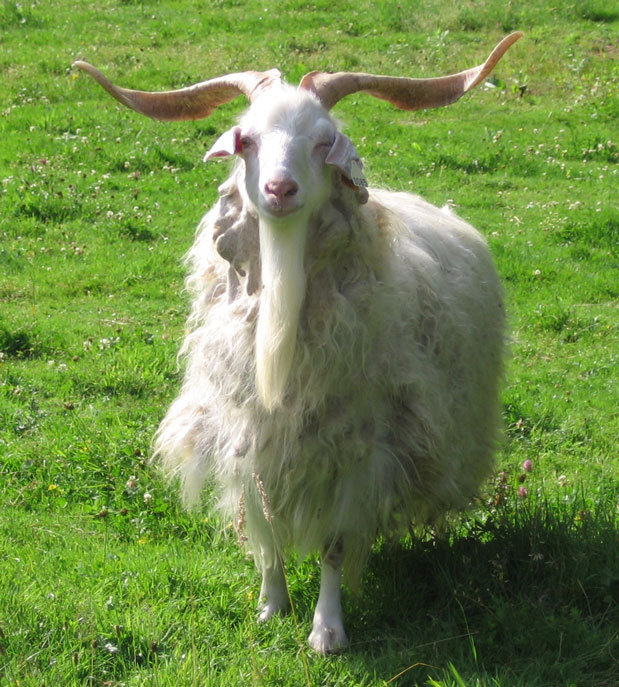
Aren't they wonderful?? Don't they look enticingly spinnable?? ...I haven't been working much with animal fibres lately, but after visiting these creatures, I may remedy that over the next few weeks. :-)
End notes, for inquiring minds
♦ The museum at Bibracte has regular events on weekends throughout the summer, but they also have permanent displays interpreting the history of les Gaulois, migrations of Celtic peoples, the "how" and "why" of archaeological research, and the numerous finds from the Bibracte site. Mont Beuvray itself is open to the public and has many pleasant trails winding through the woods and around the archaeological digs. Click here for the Bibracte website.
♦ The Plassard yarn factory and its "moutonthèque" are located in southern Burgundy. Both are open to the public at certain hours (click here for more information).
08 June 2007
A couple of weeks ago when I set up the double-flyer wheel (Em) for spinning, I dressed the distaff with line flax in the traditional French way: straight down. That's how I've dressed the long distaff used with my old French handspindles, and also how I dress the distaff that goes with my Louet. ...As I discovered partway through spinning this batch, though, not all distaffs are alike. :-/
It was time to take a serious look at how to dress a distaff -- I needed options!
The "straight-down" method of dressing a distaff is one of the simplest. You simply take part of a strick of flax fiber, separate it from the main mass, give it a shake to tidy it up, then firmly tie one end of the bundle to the top of the distaff. It hangs straight down from that end. ...To make drafting easier, you just fan the fibers out around the distaff, then wind a ribbon loosely around the whole lot to hold things in place. Even though they've been spread around the distaff, the fibers still hang more or less straight down (visualize a grass skirt, held steady with a ribbon).
In dressing Em's distaff straight down, though, there one major hitch: the distaff was not tall enough to hold the lowest end of the fibers above the level of the orifices.
As problems go, this one was remarkably frustrating. Instead of drafting in a smooth line from distaff to orifices, the fibers had to be drafted down, then held below orifice level (ack!) while the twist ran down to the drafting zone. It just wasn't natural! It was especially frustrating because the longest fibers (the ones getting the brunt of the unnaturalness) are also always the nicest.
The message was clear: change the dressing technique!
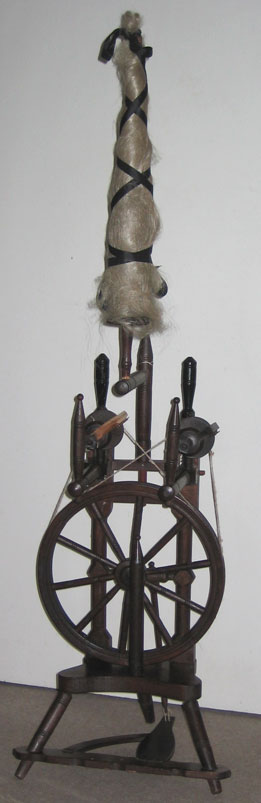
This time I decided to prepare the distaff using a method that Edward Worst and Patricia Baines refer to as cross-combing. (I can't help but think of it as "cross-dressing". :-P) In cross-combing, the process starts as usual (left): shake the bundle of flax to tidy it, then tie it securely at one end.

 The next step is to fan a thin layer of fibers out from the bundle (left). To do that, just hold your hand down on a few fibers then move the bundle away from that hand, spreading the fibers across the table (or your lap) with the knotted ribbon as the pivot point -- the fibers pull out nicely from the side of the main bunch. In the photo, the bundle has moved from right to left. (Click on these thumbnails to see the fiber arrangements in more detail.)
When one layer has been spread out, change hands and directions: fan a new layer of fiber out on top of the first by moving the bundle of fiber the other way. In the picture (right), the bundle has moved from left to right. If you look carefully, you can see how the two layers criss-cross over each other.
Keep going, fanning one way, then the other, until all fiber in the bundle has been spread out; then lay the distaff on top of this fan of fibers, tie the ribbon to the top of the distaff, and roll the fibers around the stick.

Prepared this way, the fanned-and-layered fibers take on a cone shape (left). If you click that thumbnail, you can see the criss-crossing fibers -- and also notice that the ribbon holding the fibers in place has not been tied tightly.
Pretty, isn't it?? A dressed distaff really dresses up a wheel (right).
This batch of flax behaved beautifully in spinning! With the lower edge of the flax well above the orifices, I could draft downward (and allow the twist to travel up and out into the drafting zone). The fibers were easy to "dose" for spinning, too; the criss-crossing made it much easier to pinch just the right number of fibers for each drafted length, and the "feast or famine" effect I'd had before completely disappeared.
The longest fibers were still the lowest in the dressed bundle, so they got spun first. When just the medium-length and short fibers were left in the bundle, I moved the fiber down lower on the distaff and retied it. At the end of spinning, only the shortest fibers were left; I put those aside to be spun later as tow.
It's always important to have the fiber nicely arranged on the distaff when spinning line flax; but it's doubly important when spinning on a two-handed wheel. Lumps and clumps of fiber are more difficult to "correct" when each hand is busy drafting yarn for its respective spinning head.
This experiment had a happy and clear conclusion: this is how I'll dress the distaff in the future for this wheel. It works!
End notes, for inquiring minds
♦ The beautiful, fine line flax was purchased from Fibrecrafts in Surrey, England (click here for more information).
♦ The two books alluded to above are: Linen: Hand Spinning and Weaving by Patricia Baines, and How to Weave Linens by Edward F. Worst.
03 June 2007
Bookmarks, bookmarks, bookmarks. Will it never stop???
They're habit-forming, these bookmarks. This one is unusual, in that it has no handspun yarns in it (they're lots more interesting when they do). The warp is 22/2 cottolin, 10/2 cotton (dyed with Procion MX dyes in my laundry room), and some interesting, glittery gold yarn made of I-don't-know-exactly-what.
This was actually a pretty long warp: 4 meters! The first part was woven as a long tape, because I think narrow weavings like this are really wonderful, and I know I'll need a length of tape sometime soon; and just the last bit (where I am now) is coming off as bookmarks.
Very, very fun.
End notes, for inquiring minds
♦ The cottolin yarns came from Venne Colcoton Unikat in Holland, a supplier of beautiful weaving yarns and other supplies (click here to see their website).
♦ The mercerized cotton yarns were manufactured by UKI and are available from a large number of weaving suppliers in North America. I buy my cotton yarns in "natural ecru" and dye them myself.
♦ The little weaving frame is a semi-rigid heddle and was made by my very own hands! This particular one was one of the early prototypes and has woven many, many yards of narrow wares. If you'd like a semi-rigid heddle of your very own, they are available (click here for more information).
Return to top of page
Return to the Now spinning page